Setting up WinPLC-Engine
Requirements
- MHJ Edition or Ultimate Edition
- WinPLC-Engine
- STEP 7 5.x or TIA Portal V11/12/13/14
Sample Project
WinPLC-Engine does not require any configuration to be used with Factory I/O. The following steps describe how to setup WinPLC-Engine to be used with STEP 7.
WinPLC-Engine must already be running before you start TIA Portal.
-
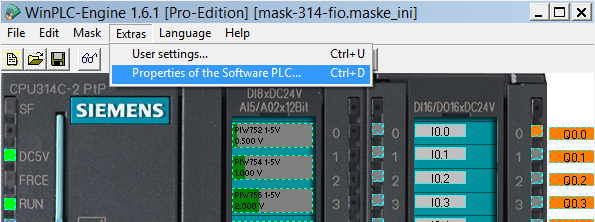
Start WinPLC-Engine, click on Extras > Properties of the Software PLC.
-
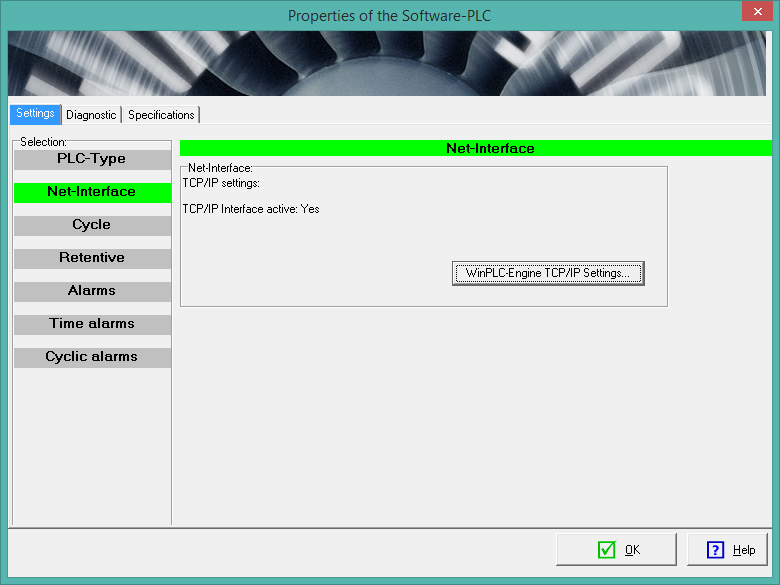
On the Settings tag select Net-Interface and click on WinPLC-Engine TPC/IP Settings...
-
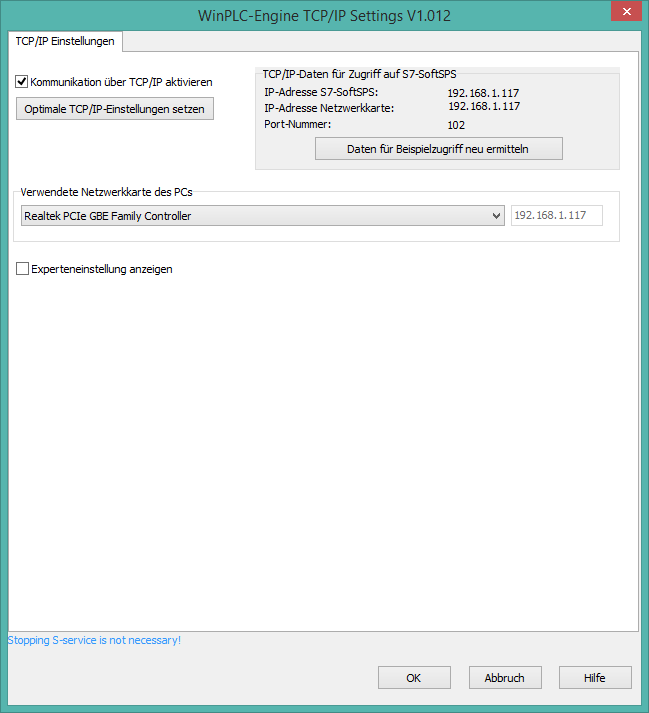
Choose a network interface from the list. Take notice of the IP Address, you will need it when setting up STEP7 or TIA Portal. Click on OK.
-
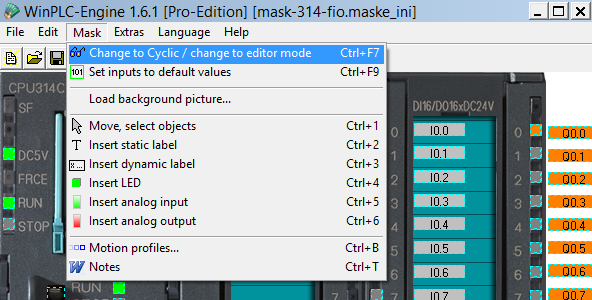
Press Mask > Change to Cyclic to switch WinPLC-Engine to cyclic mode. Either STEP 7 5.x or TIA Portal can now be used with WinPLC-Engine.
Configuring STEP 7 5.x
-
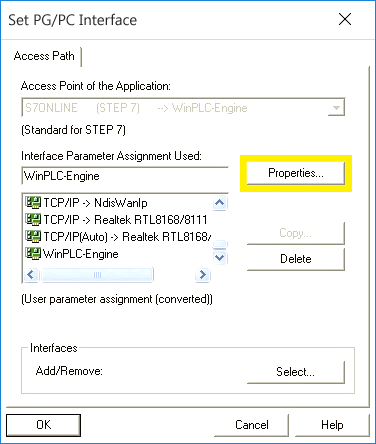
Start STEP 7, Click on Options > Set PG/PC Interface...

-
Select WinPLC-Engine from the interface list and click on Properties...
-
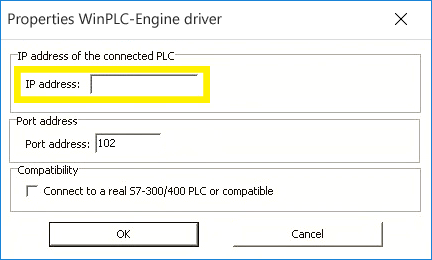
Enter the previously selected WinPLC-Engine IP address into the dialog. Click on OK.
-
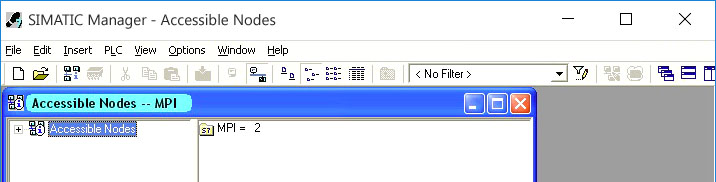
To test the connection to WinPLC-Engine click on PLC > Accessible nodes. If the entry MPI = 2 is visible, it indicates a successful connection between WinPLC-Engine and STEP 7.
Configuring TIA Portal
-
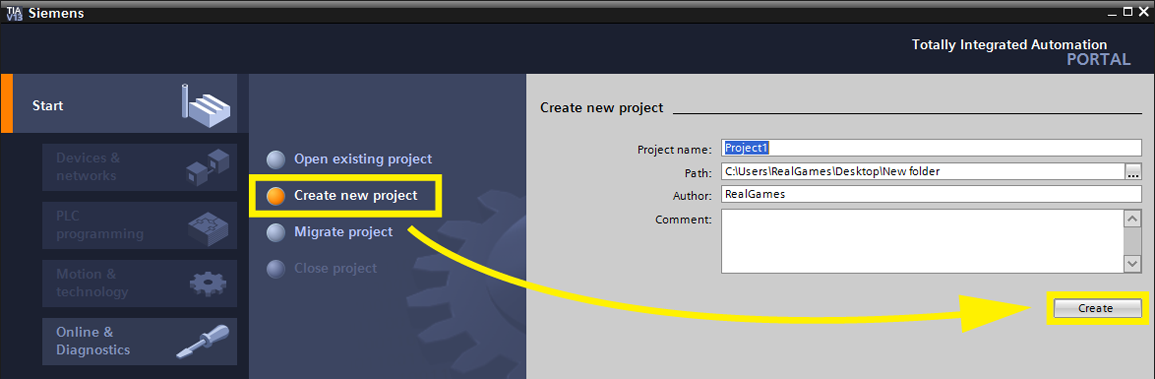
Create a new project in TIA Portal.
-
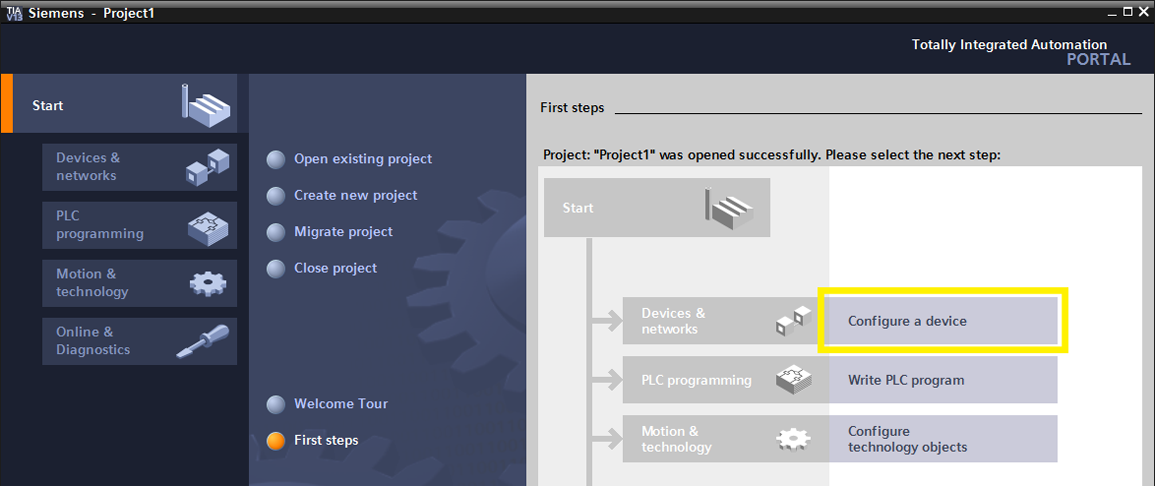
Select Configure a device.
-
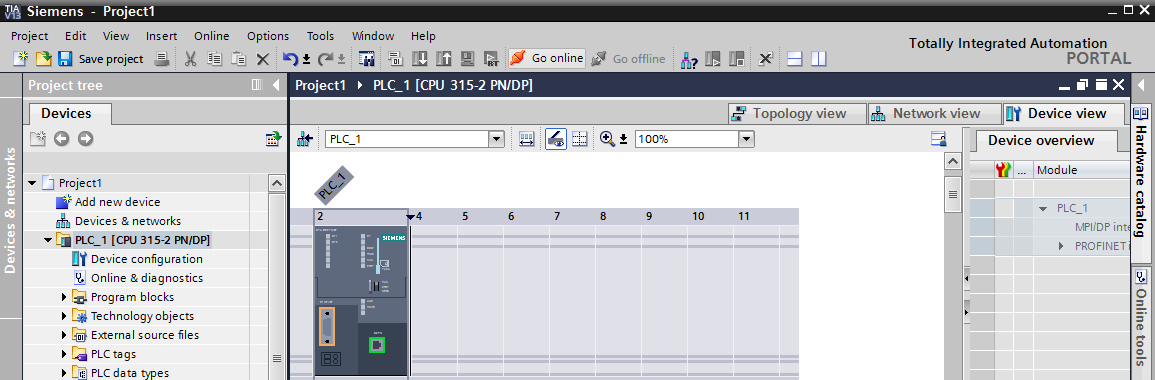
Click on Add new device. From the controllers' tree expand SIMATIC S7-300 > CPU > CPU 315-2 PN/DP, select the CPU under it and click on Add.

-
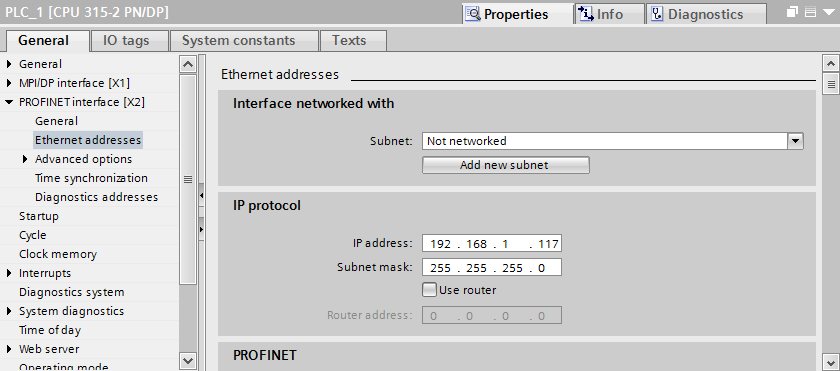
On the General tab of the Properties page expand PROFINET interface and select Ethernet addresses. Enter the previously selected WinPLC-Engine IP address.
-
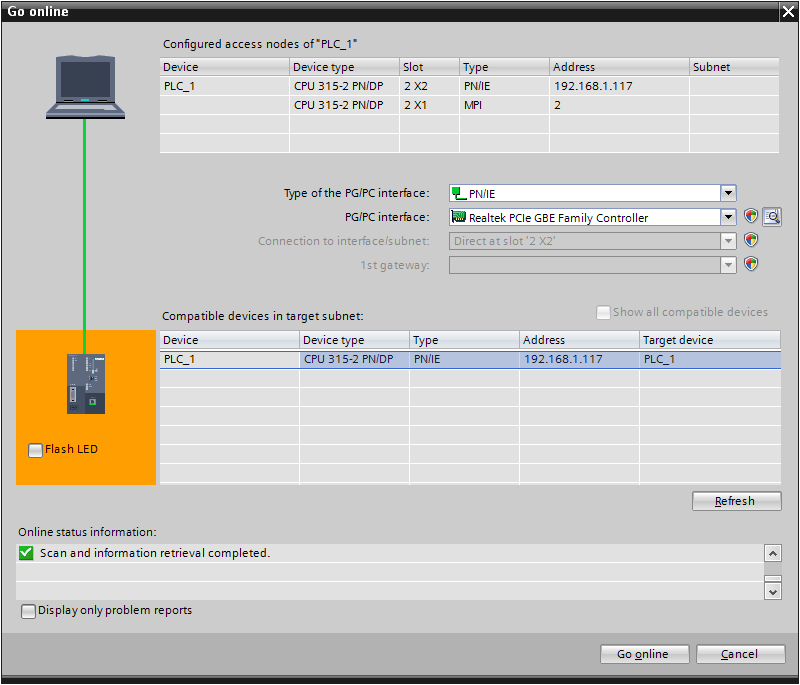
Press Go online.
-
Choose PN/IE as the type of PG/PC interface and on PG/PC interface select the network adapter. When scanning completes, select the PLC from the list of compatible devices and press Go online.